

Google Sheets has changed the workflows of many teams, allowing them to collaborate effectively and efficiently even across time zones.
With the Lumar Zapier integration, you can use Zapier to create an automated dashboard in Google Sheets. This could then be further visualized with a dashboarding tool like Tableau or Google Data Studio. In this guide we will walk you through how to set up a Zap that automatically updates rows with the latest report values when a crawl completes.
How to Access Lumar’s Zapier Integration
Once you navigate to the shared link you will need to login to continue. If you do not already have a Zapier account you can sign up for a free account and begin using the integration straight away.
Setup the Google Spreadsheet
You will first need to create the Google Spreadsheet itself with the basic structure. To do this, go to Google Sheets and click ‘New’ and then ‘Google Spreadsheets’.
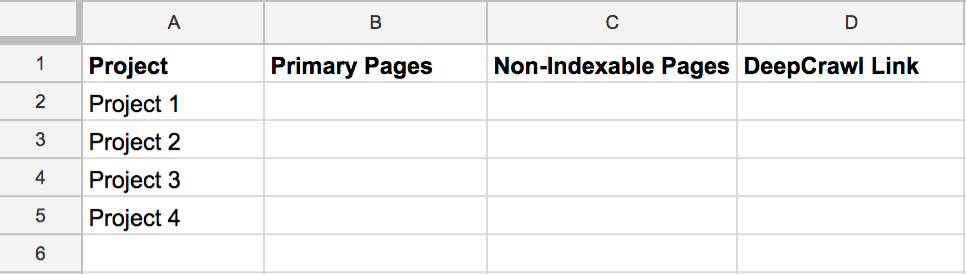
Now we’ll add the column headers to the Spreadsheet. The first column will be used for the name of the project, so label it ‘Project’. In this example, the reports we will be using are Primary Pages and Non-Indexable Pages so label the next two columns as ‘Primary Pages’ and ‘Non-Indexable Pages’.
Another addition that may be useful is to add another column called “Lumar Link” which would store the link to the project in Lumar so that you could jump straight into the Lumar dashboard straight from the Google Spreadsheet.
Now we’ll need to add a new row for each project by entering the name of the project in the project column. You should now have a Google Spreadsheet that looks like this:
Setting up the Trigger
Once you’re logged into Zapier click ‘Create this Zap’ to begin. Now we will setup the ‘trigger’ that activates this rule. For this use case the trigger would be: ‘New Completed Crawl Report’, so ensure that that trigger is selected and click: ‘Save + Continue’.
You will then need to connect your Lumar account to Zapier by clicking ‘Connect an Account’. This will open a new window where you will need to input your Lumar API credentials which you will first need to generate.
Note: You will only need to do this once to setup your account, after that your account will always be available on this page and you simply have to select it and click ‘Continue’.
Connecting your Lumar Account
To generate your Lumar API credentials, navigate to the ‘API Access’ page in the Lumar app which can be found in the navigation menu by clicking on your account name in the top right of the page. Once you’re there, click on ‘Generate New API Key’ and a modal will appear with the token inside.

Copy the token and paste it into the ‘Token’ field in the Zapier window. Then go back to the ‘API Access’ page in Lumar app and look for the Key ID which can be found in the table. Copy the Key ID and paste it into the ‘Key ID’ field in the Zapier window and click ‘Yes, Continue’.
You’ll then be taken back to the Zapier interface where you will now see your account appear in the list. Select that account and click ‘Save + Continue’.
Setting the Options
Click the drop down list to select your Lumar account, then select the project you want to use in this zap from the project drop down list (you can search for a project if you find that easier).
Finally, select which Lumar reports you want to use in this Zap (you can select multiple reports using the plus button). In this example we will select Primary Pages and Non-Indexable Pages.
Now that you’ve set the options, click ‘Continue’. You will then be presented with a summary of your configuration. Click ‘Fetch + Continue’ to test that your configuration will work properly.
Provided everything was setup correctly you should see a green “Test Successful” message and you can click ‘Continue’. If you see an error message, go back to the ‘Edit Options’ screen and try again.
Setting Up the Action
Now that we have set up the Trigger we can set up an Action to update a row in a Google Spreadsheet. Using the search bar, search for the Google Sheets app and select it. For this zap we will be updating rows in a Google Sheet so select ‘Update Spreadsheet Row’ and click ‘Continue’.
Next, you will need to connect your Google Sheets account to Zapier. To do this, simply click ‘Connect Account’ and a new window will open asking you to sign into Google and allow Zapier to access your Google account. Simply click ‘Allow’ and you will be taken back to Zapier where your Google account will now appear in the list. Select the account and click ‘Save + Continue’.
On this page we will configure the finer details of how the Spreadsheet row should be updated.
First, use the ‘Spreadsheet’ dropdown list to select the spreadsheet you’d like to update. (You can also search for it using the search bar inside the dropdown). Next, select which worksheet should be updated within the Spreadsheet. Next, select the row to be updated by clicking on the dropdown and selected the correct row number e.g. if Project 1 is row 2 then select 2 from the dropdown.
The final step is to add in the dynamic data to be pulled from Lumar. Starting with Primary Pages, click the plus icon to the right of the field and select Primary Pages Total Rows (this is the total count for the Primary Pages report, but you could also use the Added, Removed or Missing Totals if you wanted). A badge should appear in the field with a sample number inside. Repeat this process for the Non-Indexable pages report.
Optional Lumar Link
If you’d like, you can also add in a link to the Lumar project by clicking the plus icon and selecting the Href field.
You can then click ‘Continue’. Again, you’ll see a summary of the configuration, so click ‘Send Test to Google Sheets’ to test that your configuration will work properly. Once you see the green ‘Test Successful’ message, click ‘Finish’ and you are done!
Note: Now you’ll just need to repeat this process and create a new Zap for each row/project in the Spreadsheet.
If you have any issues in setting up the Lumar trigger or the Slack action, don’t hesitate to drop us a message and one of our support team will be happy to assist you.


