Task Manager helps you increase productivity by scheduling and assigning tasks based on real report data. Tasks can be created from any of the Lumar reports, and users can be notified of updates for either specific tasks or all tasks, as new crawls complete.
Creating Tasks
From your project dashboard, navigate to the report that identifies the issue you want to track. For example, you might drill down into a particular health score category that needs addressing, or go straight to a specific report in the top errors of the overview.
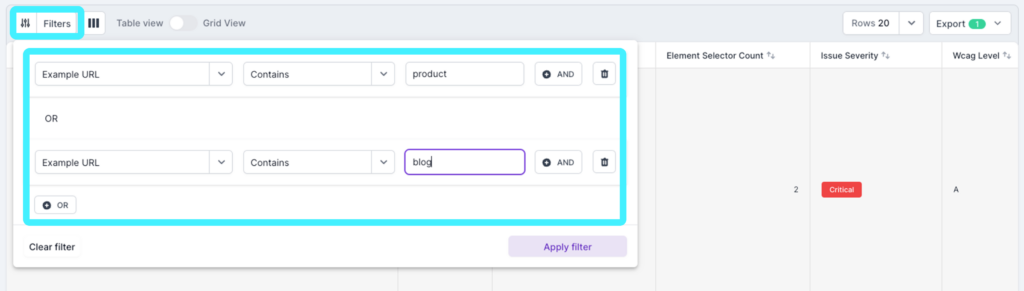
Once you’re at the report you want to create the task for, you can apply any filters you need to narrow the list down to the specific set of URLs that you need to address in the task. When the relevant filters are apple, click on the ‘Create Task’ button just above the report table.
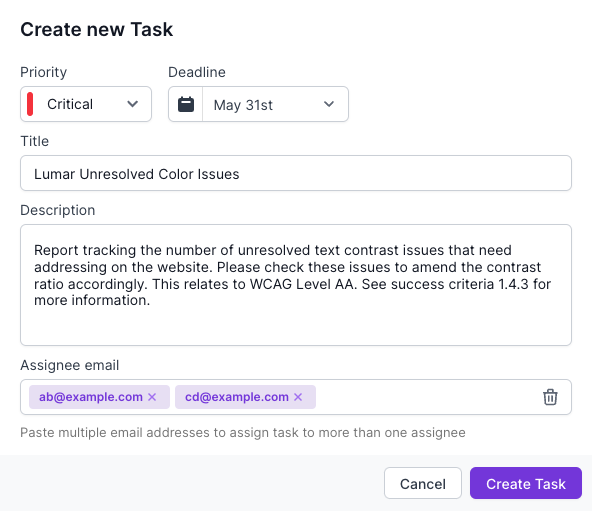
When the task details window opens up, you can complete the following details:
- Priority – Set from a simple note, or low, medium, high or critical priority.
- Deadline – Here you can set a date by which the task needs to be completed.
- Title – The main title of your task. We suggest being a little descriptive here, so use something like ‘URLs that need redirections set up’ rather than just ‘Redirections’ so the viewer will be able to get an idea of what the task relates to in the task list.
- Description – Here you can describe what needs to be done. We suggest putting as much detail in here as possible, so whoever is receiving the task knows what they need to do.
- Assignee email – Here you can assign one or more email addresses that will get notifications of the task being set up, and updates when new crawls complete.
Once you’ve filled in the relevant details, click ‘Create Task’.
Viewing Tasks
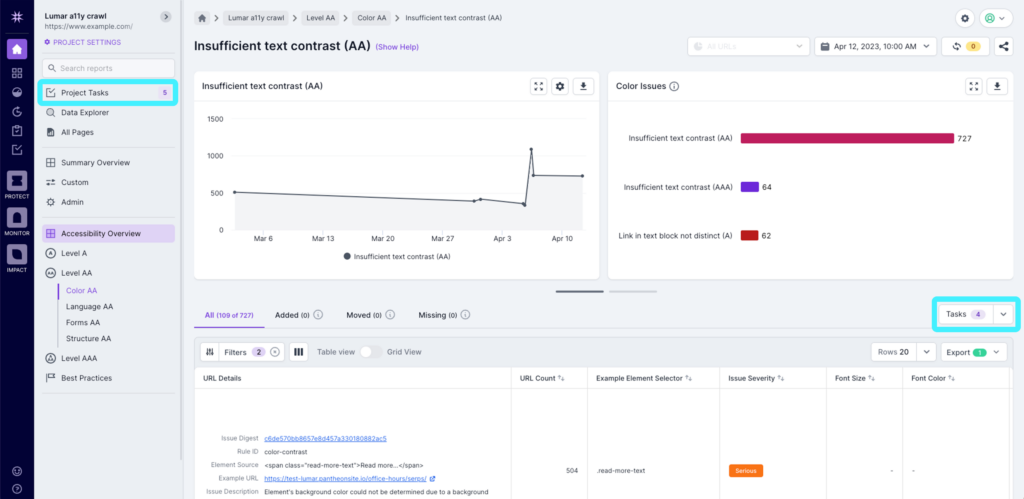
Once tasks have been created, you’ll see that the ‘Create Task’ button changes to show that there is 1 task associated with the report. If you need to create another task, click on the down arrow next to the task count and click ‘Add Task’.
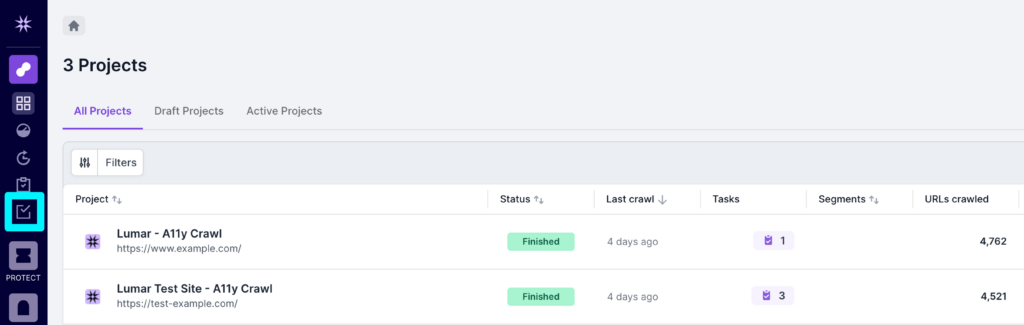
You can also see the total number of tasks related to the overall project in the left-hand navigation. To view your tasks, click on Project Tasks and you’ll be taken to the product list.
You can also see all tasks across your account by clicking on the Account Tasks icon in the left hand navigation.
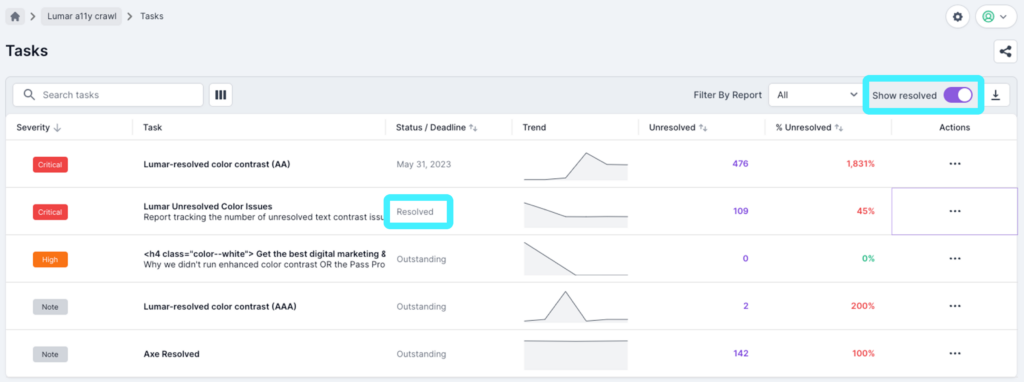
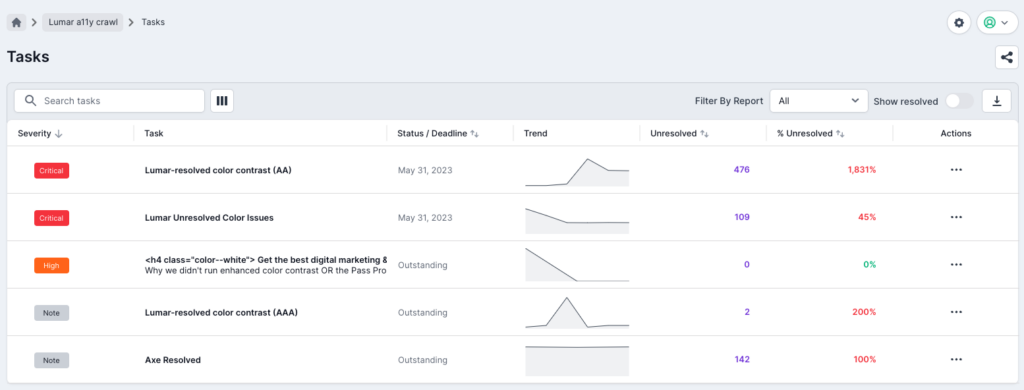
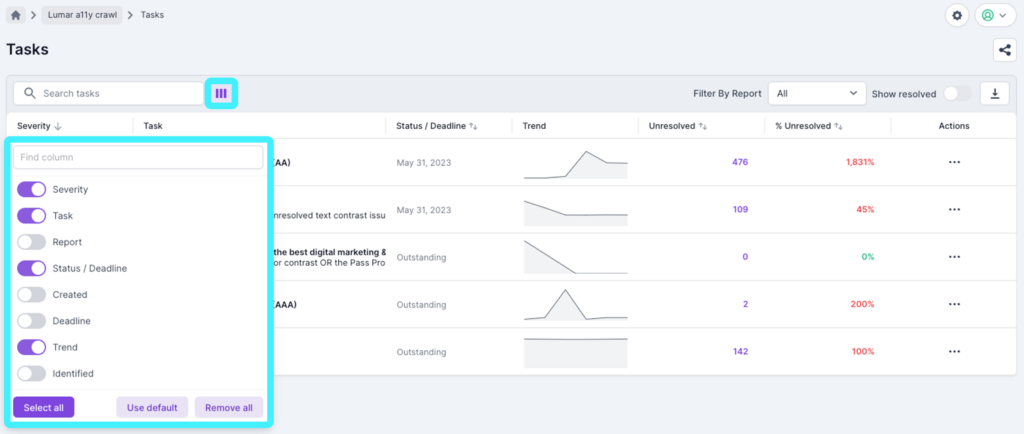
For each task you’ll see the following by default:
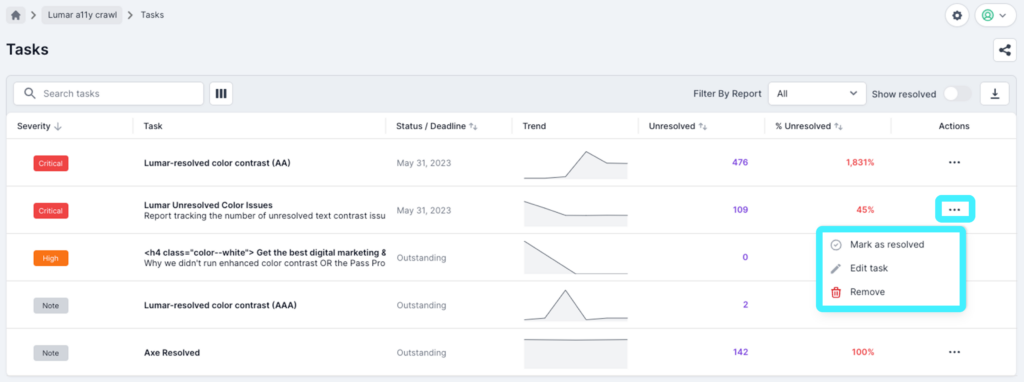
- Severity. Either Note, Low, Medium, High or Critical. You can sort by this column by the highest or lowest severity.
- Task. Hover your mouse cursor over this area to see the full description.
- Status/Deadline. The date set for completion of the task. You can also sort by this column to see tasks in date order.
- Trend. As new crawls complete, you’ll see the trend line develop for up to the last 30 data points. If only one crawl has been completed
- Unresolved. The count of URLs for the task found in the latest crawl.
- % unresolved. The count of URLs for the task as a percentage of the count when the task was first created. If there are more URLs for the task now than when the task was created, this will be above 100%.

You can also use the Columns icon to see additional information:
- Report. The report the task was created from. If enabled you can click on this to go to the report.
- Created. The date the task was created.
- Identified. The count of URLs for the task when it was created.
- Assigned To. The users that have been assigned to the task, which can be very useful if you have a lot of assigned users.
- Link. The link to the report the task was created for.
Task Actions
From the task view, clicking on the Task will take you to the report the task was created from, so you can see affected URLs and fix the issues. Any filters you applied when the task was created will be in place, so you will see the exact same report.
As you fix issues from the report and new crawls complete, the number and percentage of unresolved issues will reduce.
At the end of the task view, you’ll see three dots in the ‘Actions’ column. Clicking here will allow you to:
- Mark as resolved. Once all issues have been addressed, you can resolve the task which will remove it from the list.
- Edit task, to amend any of the details, including the severity, deadline, etc.
- Remove, to delete the task.
As mentioned, once you have resolved a task it will disappear from the list. However, there is a toggle on the table which will allow you to show resolved tasks, and mark as unresolved if required. If you have designed a task to track a specific issue, it may be worth leaving it open so you can quickly see any recurrences that may arise.